2020java框架教程:spring注解以及整合Junit
1.创建web项目
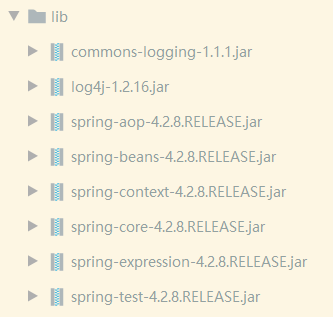
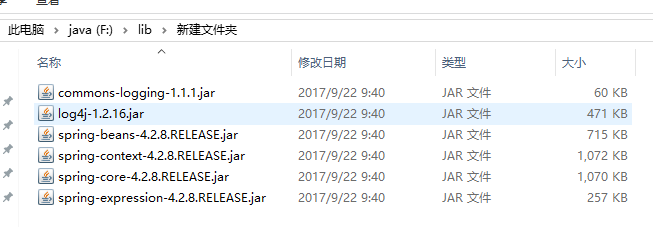
2.导包
3.导入配置文件log4j.properties
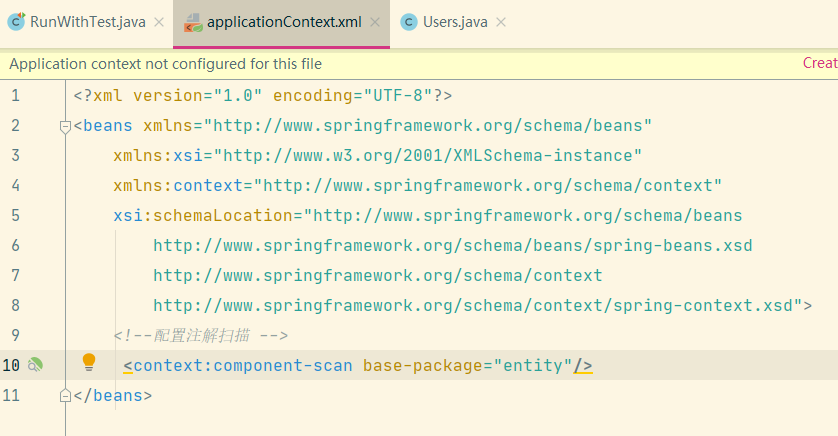
4.添加容器以及配置注解扫描:applicationContext.xml
<?xml version="1.0" encoding="UTF-8"?>
<beans xmlns="http://www.springframework.org/schema/beans"
    xmlns:xsi="http://www.w3.org/2001/XMLSchema-instance"
    xmlns:context="http://www.springframework.org/schema/context"
    xsi:schemaLocation="http://www.springframework.org/schema/beans
        http://www.springframework.org/schema/beans/spring-beans.xsd
        http://www.springframework.org/schema/context
        http://www.springframework.org/schema/context/spring-context.xsd">
    <!--配置注解扫描,指定要扫描的包 -->
     <context:component-scan base-package="entity"/>
</beans>
5.配置注解扫描
<!–配置注解扫描,指定要扫描的包 –>
<context:component-scan base-package=”entity”/>
整合junit测试
1.导入spring-test包
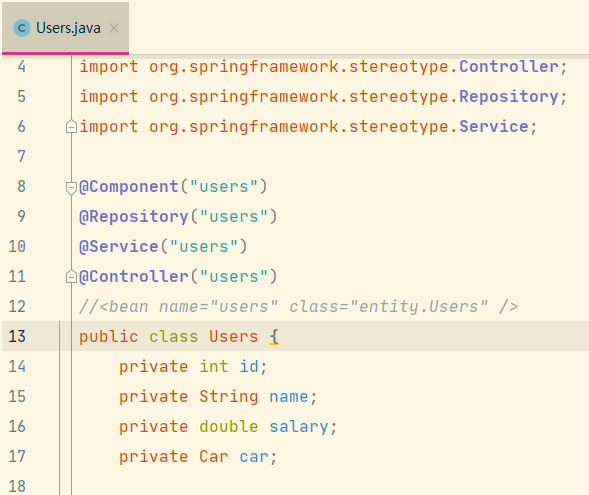
2.创建实体类
在类的上方添加注解
@Component("users") 适用于所有组件
@Repository("users") 适用于持久层
@Service("users")   适用于service层
@Controller("users") 适用于控制层
等同于<bean name=”name” class=”entity.Users” />
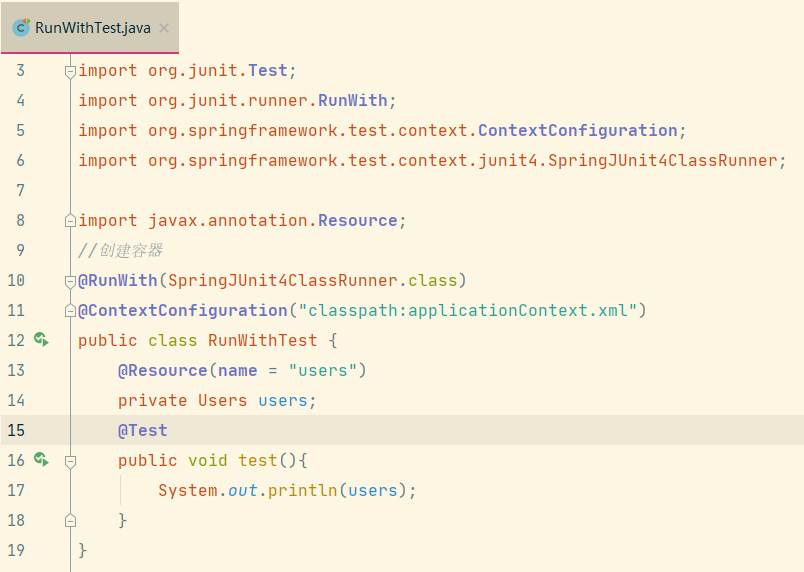
3.创建测试类
@RunWith(SpringJUnit4ClassRunner.class)
@ContextConfiguration("classpath:applicationContext.xml")
public class RunWithTest {
    @Resource(name = "users")
    private Users users;
    @Test
    public void test(){
        System.out.println(users);
    }
}
4.指定对象的作用域是否是单例还是多例
@Scope(scopeName = "singleton")  //二选一
@Scope(scopeName = "prototype")
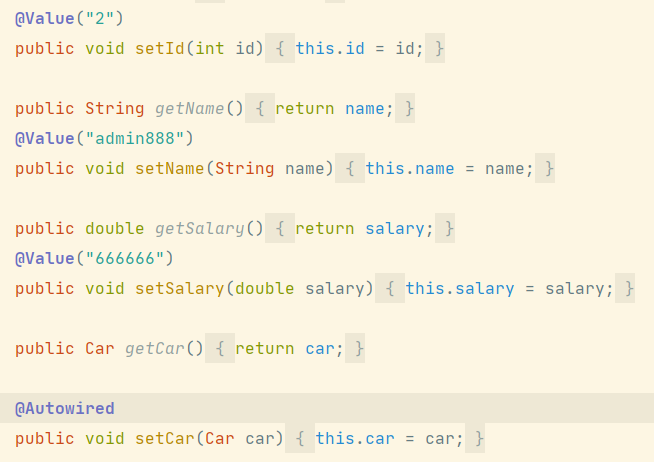
5.set方式注入value值
a.在私有成员变量中注入
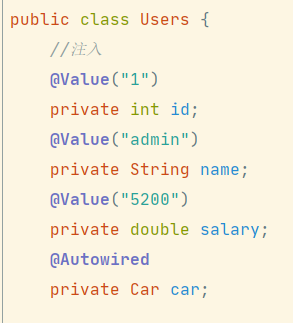
//注入
@Value("1")
private int id;
@Value("admin")
private String name;
@Value("5200")
private double salary;
@Autowired
private Car car;
b.在set方法注入
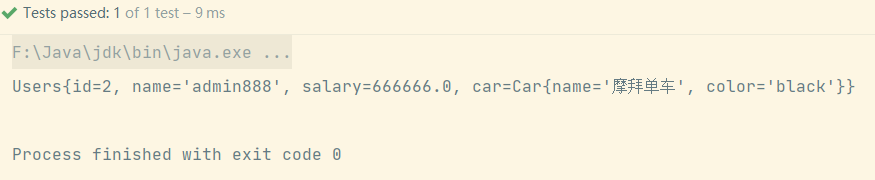
6.自动装配
@AutoWired
使用@AutoWired进行自动装配,按照对象的类型进行自动装配
@Component
public class Car {
    @Value("摩拜单车")
    private String name;
    @Value("black")
    private String color;
}
public class Users {
    @Autowired 自动装配
    private Car car;
}
自动装配存在的问题:如果一个类型有多个对象,那么可以采用以下的方式
先在配置文件中添加
<bean name="car1" class="entity.Car">
    <property name="name" value="保时捷"/>
    <property name="color" value="red"/>
</bean>
<bean name="car2" class="entity.Car">
    <property name="name" value="捷达"/>
    <property name="color" value="white"/>
</bean>
A.使用@Qualifier指定具体的对象
@Autowired
@Qualifier("car1")
private Car car;
B.使用 @Resource 指定具体的对象
@Autowired
@Resource(name="car2")
private Car car;
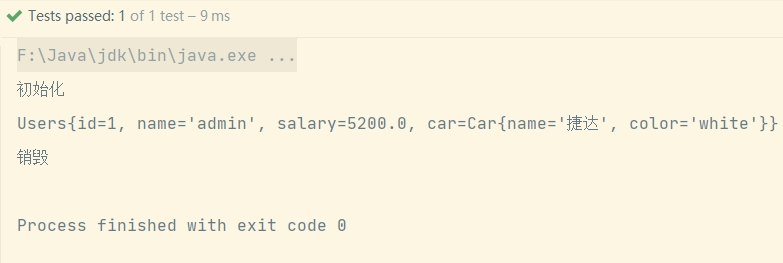
7.初始化方法和销毁方法
@PostConstruct
public void init(){
    System.out.println("初始化");
}
@PreDestroy
public void destroy(){
    System.out.println("销毁");
}
2020javaweb框架教程:spring对象创建的方式
实例工厂方法
创建工厂类,写个方法返回类对象:
public class Factory {
    public Users createUsers2(){
        System.out.println("实例工厂创建");
        return new Users();
    }
}
2020javaweb框架教程:spring对象创建的细节
单例和多例
1.默认情况下bean是单例的,scope=”singleton’;
2.多例配置:scope=”prototype”;
3.scope=”request”;
4.scope=”session”;
<!-- singleton是单例 获取的对象都是同一个地址 -->
<bean name="users2" class="entity.Users" scope="singleton"></bean>
<!-- prototype 是 多例 每次构建对象都 new一个新的地址 -->
<bean name="users2" class="entity.Users" scope="prototype"></bean>
2020javaweb教程之mysql习题集合
回顾知识
简单查询:select*from 表名;
查询指定列:select sname,score from 表名;
条件查询:
比较运算符:
查询性别为女,并且年龄小于50的记录:
select*from 表名 where sex=’女’ and age<50;
查询学号为S_1001,或者姓名为liSi的记录
select*from 表名 wher sid=’S_1001′ or sname=’lisi’;
查询学号为S _ 1001 ,S _ 1002,S _ 1003的记录 IN(set)
select*from 表名 where sid=’S_1001′ or sid=’S_1002′ or sid=’S_1003′;
或者:
select*from 表名 where sid in(‘S_1001′,’S_1002′,’S_1003’);
查询学号不是S_1001,S_1002,S_1003的记录
select*from 表名 where sid not in(‘S_1001′,’S_1002′,’S_1003’);
(更多…)